Posts

Audio 12/8

Image
For my audio piece, my plan was to find a skateboard sound effect and record my voice, put it together in Garage Band band using loops, then attach the audio to the video using After Effects or Premiere. However, I found the process of flipping back and forth between watching my video and working on Garage Band. So, I figured out you can bring a video into Garage Band and put together audio for the video. Then I also realized that the original track I made was almost 2 times longer than my video. The measurement on the timeline in Garage Band is not seconds, learned that the hard way. Anyways, I believe it came out nicely. I added my own voice by recording myself saying "YO" when my friend turns into a cartoon, as if I am shocked.  Once I brought the video into Garageband, it made the process much easier, and I was able to view the video as I was making the sound. Copyright Free Sound Effects: "Skateboarder on ramp" (http://www.freesfx.co.uk/soundeffects/ska...

Animation 12/6

Image
For my animation project, I took a video of a friend of mine skateboarding. I then took the video and used Photoshop to break the video down frame by frame. I then brought the each drawing into Illustrator and drew over every frame. After the drawings were done, I loaded the image sequence into Animate to render the video. This project took me way too long, and still looks so incomplete. It will definitely be a project I will continue to work on in the future. The video is also posted in my folder within the Student Server.

Art History 11/14

Image
Kevin Wagenheim 11/14 Art History For my Art Project, I inserted my head onto a portrait of Captain Oliver Hazard Perry by Edward Mooney. When I first began this project, I quickly learned that cutting out my frizzy hair is not easy one bit. So after many trials and errors of pictures and different portraits to use, I finally came up with this. I began with cutting out my face from my original picture. Then, I added a angled brush stroke filter to my face, and adjusted the brightness. Then using the clone stamp tool, I was able to continue the background and take out the original head. I then cut my face up a little better to blend in with the picture. Original Pictures:

Somewhere 11/8

Image
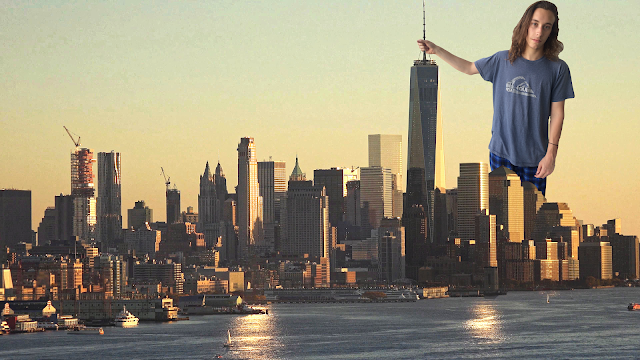
Kevin Wagenheim 11/8 Somewhere I took a picture of a city skyline from Google. I then took this picture of myself to try and make it look like I was holding the top of the tallest building. After taking the picture and uploading into Photoshop, I then found that my hand needed to be a little higher. I then used the puppet warp tool to raise it instead of taking a new picture. I then lightened the background to try and match the lighting of myself in the picture.  Original Pictures: Couple of progress shots:

Autoscopy 11/8

Image
Kevin Wagenheim 11/8 Autoscopy The first filter being used is the Glowing Edges filter on top of the Paint Daubs filter both found in Photoshop. The second filter being used is called Glitch by Creativetaco. I found this filter online, downloaded it and applied it to my picture. For the last one, I decided to mix the two together. Original Picture:

Portrait Poster 10/31

Image
Kevin Wagenheim Art 210 10/31 Portrait Poster For my portrait, I decided to go with the low poly self portrait style. I thought that my portrait came out cool, so I tried to make the background low poly as well using a radial gradient. For my first try at it, I thought it came out pretty well. For a final poster, I made a poster ad telling students to study digital arts to make something like this! Portrait Picture: Process Shots: Finished and Reflected: Added some hair: Background Process:

Gradient Mesh 10/27

Image
Kevin Wagenheim 10/27 Gradient Mesh Original Photo: Proof: Work in progress shots: